


Photo Engraving Ceramic Tiles: Norton White Tile Method
Experimenting with your CO2 laser by engraving different materials can unlock new creative techniques. Laser engraving photos on dense materials like slate, glass, and stone are quite common, and even laser engraving tile is becoming more popular. However, photo engraving tile can a bit more difficult to manage.
Can you laser engrave ceramic tiles?

Engraving ceramic tiles with a CO₂ laser introduces a problem just like glass engraving. As the CO₂ laser creates the design, it micro-fractures the surface of the ceramic tile. This creates two issues. The first is that the glazed tile surface is waterproof, but the laser chisels away from this layer — the tile is no longer completely waterproof and is therefore unsuitable for anywhere that it may get wet.
Secondly, as with engraving glass, laser engraving brings no color to the tile. Unlike wood which chars and engraves an attractive brown color, the engraved ceramic tile needs to be colored afterward. You can rub colored paint or powder into the engraving and seal it over with a varnish or protective finish.
However, there is a technique that can be used to create a permanent engraving on tile while keeping it completely waterproof — a totally usable laser engraved tile that can be installed anywhere!
Known among the laser community as the Norton White Tile Method, or NWT method, the science behind it has been well-known by scientists for years but the method of using the hobby CO₂ laser has been perfected by Nicky Norton who runs a popular Facebook group “Den of Lasers”.
What is the Norton White Tile method?
The Norton White Tile method (NWT) relies upon coating the regular white ceramic tile with Titanium Dioxide (TiO2) and then firing the laser at it. Now, TiO2 is fortunately found in many white paints — it actually gives the paint its white color, making it quite easy to obtain, and it has no health issues to be careful of (other than handling the spray paint).
Different paints have different formulations and varying amounts of TiO2, so some experimentation will be needed. Although Rustoleum white spray paints have been found to be very suitable, even cheaper ‘no brand’ versions have had success.
How to Laser Engrave Photos on Ceramic Tiles
Project Materials:
To complete your laser engraved ceramic tile using the Norton white tile method, you will need the following materials:
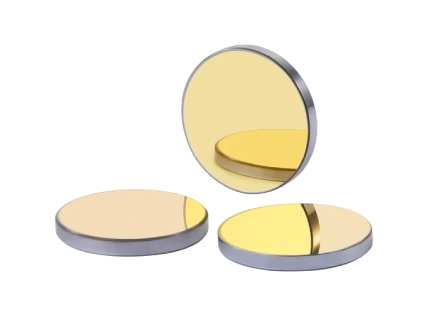
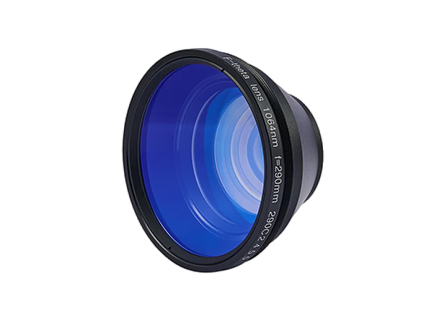
- Compound Engraving Lens as the dot size of the standard lenses is too large.
- White paint containing TiO2 or mix your own TiO2/ethanol solution.
- White ceramic tiles
- Your workbed must be absolutely level with the laser head and your laser beam must be accurately focused.
How does the Norton White Tile method work?
There is a fairly complex scientific principle in use with NWT — for those that would like to know more, several scientific papers have been published and a web search will locate them. However, to paraphrase the science
The photocatalytic activity of TiO2 layer, consisting of a mixture of anatase and rutile - two crystallographic forms of TiO2 is modified by laser radiation. The layer is thermally modified using a laser causing a clearly visible surface darkening effect. The XRD spectra show that phase change transition (from anatase to rutile) took place.
Essentially, when the laser beam strikes the TiO2 it creates a modification to the nanocrystalline structure that both darkens and sinters it, making it bond permanently to the tile’s surface. The result engraving design cannot be removed, even after aggressive washing in a dishwasher.
To successfully laser engrave a ceramic tile using the NWT method, we must consider two key points.
The darkening of the TiO2, when struck by the laser, varies by the intensity and the duration of the laser beam BUT the bonding (sintering) of the TiO2 to the surface of the tile requires more power still. This means that it is not possible to obtain a variable shade of darkness with this method — after the laser passes over the surface, it will be black or it will be white.
Fortunately, there is a method of creating grayscale images using just black and white and this is called Dithering. You can use dithering for photo engraving on tile.
What is dithering?
If you examine a picture in a newspaper under a microscope, you will see that the image is made of small dots that when viewed from a distance make up the picture. Essentially, the dots are so small that they blend into each other and our eyes interpret the shade based on the density of the dots.

Over the years, various computer algorithms have been created to try and improve the quality of photos beyond standard newsprint — some of these have proven to generate very realistic results with the Norton White Tile method. There are several to choose from and it comes down to personal choice after experimenting. One parameter that really does affect the quality of the image is the density of the dots, known as DPI, or “Dots Per Inch”. Typically, the smaller the size of the dot, the higher the quality of the photo.
Laser Beam Spot or Dot Size
When your laser was manufactured, it was fitted with a universal focusing lens (typically 1.5” or 2”) that offers a great compromise between cutting and engraving. However, these lenses create a typical dot size of around 0.25mm when focused, which means that in terms of dots per inch, the best that they can achieve is approximately 100dpi. Any photo engraving produced at that resolution will be rather grainy and unappealing.
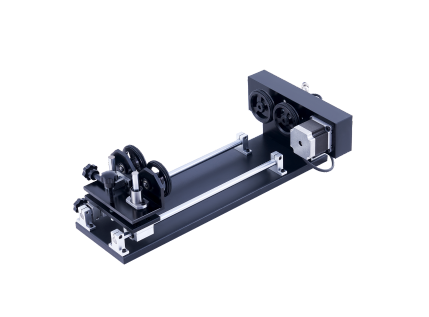
Fortunately, work has been done by laser enthusiasts to develop an alternative focusing lens called a Compound Engraving Lens. This CO₂ laser engraver upgrade can be purchased relatively cheaply and comes with a replacement lens housing with the new lenses as well as a new nozzle. The main difference from the standard focusing lens is that the Compound Engraving Lens uses two special lenses mounted back to back. The resulting lens can achieve a dot size of 0.1mm — capable of engraving a 254DPI image that looks much more attractive.
Another advantage of having a small dot size on your laser is that the energy density is significantly increased. If your laser is generating 20W of power at the point at which it strikes the surface, then the energy density is increased by 6x when the dot size reduces from 0.25mm to 0.1mm. Having a smaller laser beam spot size with accurate focusing can further maximize your laser power and efficiency — critical for dense materials like laser engraved tile.
Focusing Your Laser Engraver
Typically, the bed of your laser can be raised or lowered to accurately focus your laser and the ideal distance from the nozzle to the workpiece is determined using a ramp test. Due to the criticality of accurate focusing for the NWT method to be successful, it is also essential that your laser bed is level so that the correct focus is maintained across the whole ceramic tile. Spend some time getting this correct.
You will see from your ramp test with the Compound Engraving Lens that the point of correct focus is very clearly defined and sharp — showing why this lens is ONLY suitable for engraving on the surface and NEVER for cutting.
Preparing Your Tile
Because of the compound lens’s need for precise focus, the chosen tile must be perfectly flat. However, low-cost white bathroom tiles from your local hardware store will work as well as any other. Ensure that the reverse side is also flat and that it can sit securely on the laser bed.
The TiO2 is most easily obtained from a can of white acrylic paint. Typically these contain between 5% and 15% TiO2 depending on the brand and they’re easy to apply to the tile.
Alternatively, TiO2 powder can be purchased and mixed with ethanol and applied with an airbrush — this may be the preferred method if you are doing bulk orders. Mix 2 tablespoons of powder with 4 fl oz of ethanol and shake thoroughly before and during application. Whichever you use, spray in one direction on the tile, wait for it to be touch dry, and then rotate the tile through 90 degrees and spray another light coat. Wait for it to dry completely before putting it into your laser.
Testing Your Laser Settings

Every laser will perform slightly different, so it is essential to test your laser with a test tile before committing to the final image.
We are testing to ensure that the laser has sufficient power to both darken the TiO2 and also to sinter it into the surface of the tile. This latter phase needs significant power, but too much will destroy the surface of the tile, ruining the final image.
To create a test for your laser engraved tile, we simply import a simple black dox image into LightBurn and duplicate it into a grid, assigning each one to a different layer. Then for each layer, we assign the same dither pattern and adjust the speed and power settings. Each image in the row has the same speed and each image in the column has the same power, but subsequent images have increasing values. The resulting matrix should therefore test the best combination of speed and power for the engraving. You can download my LightBurn file here, but you will need to set the speed and power parameters appropriate for your particular laser.
Place the tile on the laser bed and run the test image.
To check the test results, remove the laser engraved tile from the laser and clean off the paint/TiO2. You can use ethanol or acetone, following the safety precautions advised on the bottle.
The results should show some of the squares removed completely, some that are partially removed, some that remain with no damage to the ceramic tile surface, and some that have started to damage the tile. From this, you can determine which combination of speed and power work best for your laser and paint combination.
Preparing Your Photo Engraving

Obviously, your images for photo engraving will need to be converted to black and white and also to a dpi that matches the dot size of the laser. Do not be tempted to increase the DPI beyond what your laser is capable of as it will not create better images and will introduce artifacts that will degrade it. 254DPI is the ideal setting for a CO2 laser with an accurately focused Compound Engraving Lens.
When preparing the photos for engraving, LightBurn can do a fair job with most images. However, you may want to explore other options such as plugins for Photoshop and Lightroom, or standalone products such as ImageR, all of which provide you with much greater control over settings as well as previews of what the final image will look like. Just remember that these 3rd party products pre-dither the image, so when loaded into LightBurn , you need to select the Pass-Through switch in the Cut Settings Editor. This prevents LightBurn from trying to dither the image over again.
In LightBurn, draw a box that is the same size as your tile and add the image over the box. If you want the photo engraved across the entire tile then make it a little larger than the box.
Run Your Photo Engraving
Now, set up the photo layer with the ideal settings from your test tile and you are ready to engrave. Note that you only need the minimum amount of air assist — just enough to keep the lens clean.
TIP: lay a piece of stiff card on the laser bed and engrave the box only — this will allow you to position the tile accurately for the engraving — but make sure that you focus the lens with the card in place!
Once the tile has been engraved you can remove it from the laser and clean it using your choice of solvent. The image should be permanently engraved onto the tile without any damage to the tile surface. If everything looks good, remember to save the settings in the LightBurn library along with the details of the paint used.
If you have areas of the tile that are lighter than the rest, then check how you applied the paint to ensure that it has an even coat over the entire surface, and also recheck that your laser bed is absolutely level to the laser head.
TIP: If you are doing a lot of tiles then a supplementary bed can be easily constructed to ensure that the tile is perfectly level with the laser head. Obtain a piece of flat 4mm sheet steel that is about twice the size of the tiles you engrave and drill a hole in each corner to take a 12mm bolt. Attach a nut to the underside of the steel with a very quick weld (to avoid any distortion it only needs to be a tack weld) - screw the bolt down into the nut from the top and attach a dome nut to it. Now place the supplementary bed onto the laser bed and move the laser bed and use a spacer to set the nozzle a precise distance off the supplementary bed. Now move the head to each corner and use the bolts to raise or lower each corner so that it is perfectly level with the laser head. Fine threaded bolts are recommended for absolute precision.

CONCLUSION
A CO2 laser engraver is a great tool for photo engraving tile. Low-cost ceramic tiles are excellent to engrave photos with the Norton White Tile method, as long as you are careful about your laser focus. You can create detailed image engravings that will impress your friends and clients. Plus, the laser engraved tiles will remain waterproof — and likely to last a lifetime.
