


Dynamic layered laser cut animated spinners - SVG File

 Chats with
Experts
Chats with
Experts
Dynamic layered laser cut animated spinners - SVG File
Overview:
This project will consist of six fully laser cut animated fidget spinners. This page will outline the materials needed, basic instructions on how to make, assemble and use the animated spinners. Each of the 6 animated spinners will use this guide below. Additionally, the project will be fully detailed, and explained, over the course of 9 short videos set to be finished before 3/27/23. You will be able to create the first two spinners following the instructions below as soon as the first video is released.
Materials List:
6 Colored cast Acrylic sheets:

This is the main pack of acrylic used in this project. Although any 2mm material could technically be used.
(optional) 3 Colored Glitter Acrylic:

This acrylic is optional and I will be using it for the creative accents on some of the spinners.
Bearings:
You will need 1 R188 bearing for every spinner that you want to make.
10 Pack available here from amazon:

These bearings work the best for seeing the animation as they have a very long spin time. Any R188 bearing would technically work as long as it spins well.
Single sets with spinner caps available on our site here at Spinnermation.com: These are the same bearings as above, but they can be purchased individually from us and as a bonus include caps that are 3d printed specifically to work with the R188 bearings.
Link from Spinnermation:
A bottle of your favorite super glue.
You pick. Any super glue will work. I know most makers have their favorite though.
Files links, Cutting tips and assembly instructions
Files
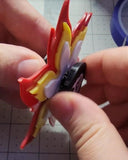
Spinner 1: Fire Spinner.svg
Spinner 2: Rainbow hearts spinner.svg
Spinner 3: TBD
Spinner 4: TBD
Spinner 5: TBD
Spinner 6: TBD
Laser Cut Caps: Laser Cut caps.svg
Bearing sizing test: (Optional Piece) Test for bearing fit.svg
Cutting instructions and tips
1. (optional) A good way to run a test would be to cut the very small bearing fit file. This way you can test your cut settings and also test the fit of the bearing. You are looking for a snug fit once the spinner is assembled, so this piece will help you to figure out that fit. This is optional though. There is always glue if it’s loose or a file if it’s tight.

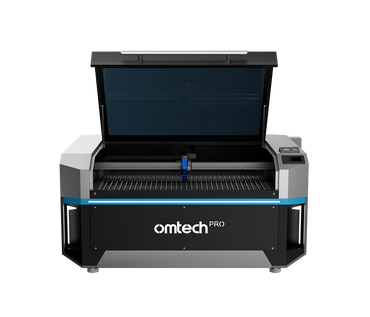
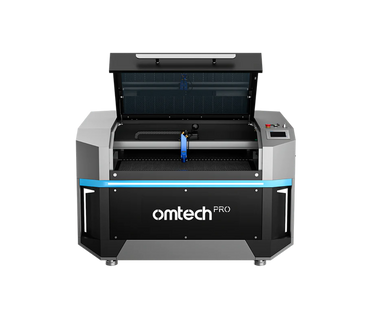
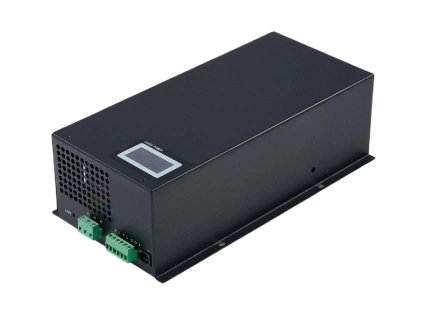
2. Cut out the spinner of your choice using the 2mm colored acrylic. This acrylic cuts really fast and easy on my laser, but your laser will likely be a different wattage than mine. You likely will need a different speed and power level than I did. For instance I am running the Omtech AF2028-80 80 watt laser and I used 55% power at 22mm speed.
Note: Peeling the film off of the acrylic before cutting is optional, however due to the intricate nature of some of the pieces peeling the film off afterwards can be tricky. Be careful.


Note: Any 2mm material can be used. The acrylic above is what I used and
includes all the colors I will be mentioning in this tutorial.
3. Cut or 3d print cap pieces. If you have a 3d printer, the 3d printed caps are
slightly easier than the laser cut caps.
The materials for the laser cut caps are listed in the file. You can honestly use any scrap material you have around for this or stack and glue pieces of the 2mm acrylic. The end goal is that you have a cap that looks similar to this. I would test whatever you use to cut out your cap nubs in the center of your bearing. You want a snug fit that is not too tight or too loose.


Spinner Assembly Instructions
So now that you have all of your pieces let's put one together.

Assembly notes: The layers of the spinner are labeled in each of the files in stacking order. In this case the red is the bottom, the yellow in the middle and the white on top.
The center hole in the layers serves a dual purpose. The first being it’s a key that will help you align the layers. The holes on the stack should line up as pictured below. They can only line up one way. Get these all aligned correctly before starting the gluing process, so you don’t accidentally glue the wrong side down. The other purpose for the hole is so that the bearing presses in easily while still being snug.

- Glue the middle layer to the bottom layer. Try to keep the glue in the middle of the piece so that when you are aligning the layers the glue does not dirty up the surface of the layer underneath. Let this layer dry just a bit before adding the next.


- Glue the top piece to the bottom and middle stack. Again only gluing in the center so that you have a little play when aligning the layers.


Before the glue sets make sure the holes on all 3 layers are perfectly aligned and then set the whole stack to the side to dry fully.

Cap Assembly Instructions (SKIP IF USING 3D PRINTED CAPS)

1. If you cut the cap color accessory, glue that to the non engraved half of the cap top. The reason that this is optional is because it is just for looks. It provides no functionality. Make it whatever color you like if you cut it.


2. Place the cap top with the engraved circle face up and put some glue in the center of the circle and spread it out a bit past the engrave. Then place the cap nub in the center of the glue followed immediately by placing the nub bearing spacer over the nub.


3. The final cap should look like this. Set this aside and let this dry and move to the next step.

Putting the bearing in
Bearing fit notes: If you adjusted the size of the center holes before cutting your pieces, your bearing should fit in snug. We all know that this kind of thing is hard to nail down just right though. Especially with a stack of 3 pieces. Because of this there is glue if it’s too loose or a file if it’s too tight.
1. Slide the bearing into the center hole to check the fit. If the bearing pushes in nicely and it stays in place, then you are done and you can move on to the next section

2. If the bearing is loose you will want to put a small amount of super glue. And I can’t emphasize enough that you only need a small amount. Maybe even just a drop on both sides that the bearing touches on the inside hole in the spinner stack. Also spread out the glue to flatten it out with the tip of the applicator. Be extremely careful when you slide in the bearing to not get glue in the center of the bearing. (If you get glue in the bearing, it could ruin it) Make sure that the bearing is perfectly flat against the bottom of the spinner stack and set this aside to dry.


Putting in your caps
Notes: This one should be pretty self explanatory. Laser cut caps should press fit into the bearings. 3D Printed caps will screw together. I would not suggest gluing the laser cut caps in because if the nubs bust off, you run the risk of ruining your bearing.

Spinner Viewing instructions
Note: The first thing you should know about these and any animated spinners is that you will not be able to see them animated with just your eyes. You will need a smartphone and a couple of free apps. There are separate apps for both Android and Iphone and are really easy to set up so that you can see the animations within minutes.
Having said that, there are two different methods for viewing these spinners. The first one will be the camera method and the second one is the strobe light method.
Method 1. The camera method:
This method allows you to view the animation through your phone screen and also make recordings of the animations to share.
4Download the camera app for your phone.
The following settings will need to be set. I have highlighted which settings need to be changed and what they need to be changed to.
Iphone Pro Movie settings:


4. Hold your phone over your spinner and then spin your spinner. You don’t have to spin it super fast. In fact, the animation works best when the spinner slows down a bit.
The Strobe light method:
This method allows you to see your spinner animate with your eyes. Opposite from the camera method, this one works best in darker rooms.
ANTI SEIZURE WARNING: Since this method uses flashing lights. This method is not recommended for people with a history of seizures of epilepsy.
Download the strobe app for your phone.
The following settings will need to be set. I have highlighted which settings need to be changed and what they need to be changed to.
Iphone Strobe Light Tachometer settings:

Hold your phone over your spinner and then spin your spinner. You don’t have to spin it super fast. In fact, the animation works best when the spinner slows down a bit.
Android RPM Meter - Strobe light settings:

4. Hold your phone over your spinner and then spin your spinner. You don’t have to spin it super fast. In fact, the animation works best when the spinner slows down a bit.
Final notes:
These spinners have been a passion of mine for almost 6 years. I hope you have enjoyed the process of making your own. Don’t hesitate to reach out to me if you have questions.
E-mail: Travis@apyrodesign.com