Glass Laser Engraving for Beginners: How to Engrave Glass Cups
How to Laser Engrave Glasses with a Laser Rotary Attachment
We have all seen beautiful glass laser engravings on sale in stores. Although these commercially available items have normally been mass-produced using sandblasting or chemical etching processes, you can learn glass engraving — how to engrave glasses with your OMTech laser engraver. With a bit of practice, you’ll create stunning laser etched pieces that not only rival the store-bought products but are fully customizable for you and your customers.
In this article, we will discuss how to choose the best types of glass for laser engraving, how to create and set up the glass laser engraving design, how to use a laser rotary attachment, and finally learn how to laser engrave glasses, producing and finishing the final laser engraved glass.
How to Choose the Best Glass for Laser Engraving
Glass is available in literally dozens of types and all with different formulas, although they almost all contain mostly Silicon Dioxide (Silicate), they can have different additives that change the way they behave. You may have heard of Soda Glass, Pyrex, Lead Crystal, etc and each of these has
different properties that determine just how successful laser engraving glass cups will be.
To understand this better, we need to understand how glass laser engraving works. If you are laser engraving wood, the laser beam hits the wood and vaporises it - that’s what creates the smoke. However, glass behaves differently. Instead of vaporising the glass, the laser beam hits the glass and causes it to rapidly expand at the point where the laser beam (which is only 0.1mm wide) hits. The surrounding glass does not expand as quickly and so the area under the beam fractures. This micro fracturing is what creates the engraving on the surface of the glass.
Depending upon the additives in the glass, this process behaves slightly differently and so having a couple of spares available for testing before committing is essential.
For example, adding lead to the glass to create Lead Crystal creates a glass that is softer than standard glass and is significantly harder to engrave successfully as the glass absorbs heat faster and so needs a higher power laser but that can then lead to the glass overheating and shattering.
The best glass to laser engrave is actually the cheapest — dollar store drink glassware will laser engrave extremely well and is a great choice to start learning how to laser engrave glasses and to get the best from your laser engraver with rotary attachment.
How Laser Rotary Attachments Work
Your OMTech laser engraver comes from the factory with fixed X and Y rails and a laser workbed area that is fixed during the engraving or cutting process. As the laser beam exits the focal lens and reaches the workpiece, it has a very small depth of focus (or focus tolerance). This means the machine itself is ideal for laser engraving on flat surfaces.
How Do Laser Rotary Attachments Work?
To overcome these mechanical limitations and engrave on curved surfaces like tumblers and cups, you can use a laser rotary attachment to rotate the object in a pre-calculated sequence as the laser fires. This rotation allows the cylindrical workpiece to remain within the laser’s focal point while counteracting the workpiece’s curvature.
The Different Types of Laser Rotary Attachments
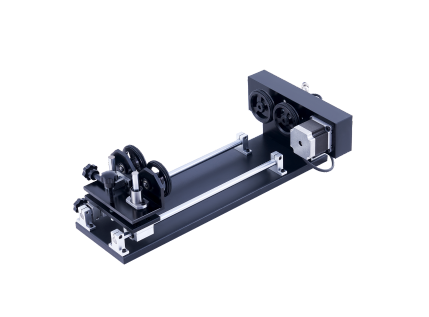
There are three main types of laser rotary attachments that you can add to your laser engraver. For my instructions and demonstration, I will be using a Jaw Chuck-style rotary axis attachment.
Roller Rotary Attachments
The Roller Rotary Attachment comprises two long rollers which rotate the workpiece and hold it in place throughout the engraving process. As the stepper motor turns the rollers, the object rotates in the opposite direction. These laser rotary attachments work with cylindrical objects such as water bottles, but anything with a handle can be very difficult to position correctly. For simple cylinders, they are quick and easy to set up. They do, however, rely on friction between the rollers and the workpiece and if they slip, the entire engraving design can be misaligned. They is also why performing a second pass of the laser is not recommended with roller rotary attachments.
Jaw Chuck Rotary Attachments
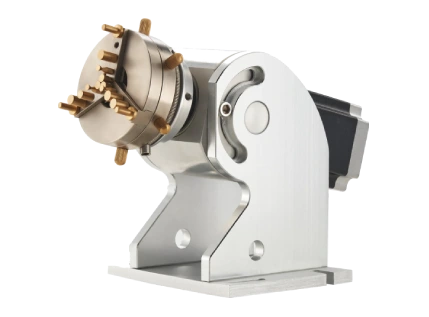
The other type is called a Jaw Chuck Rotary Attachment which has a set of jaws mounted in a chuck and which are tightened and loosened with a key. Normally they are supplied with 2 sets of jaws — internal and external. The internal ones are designed to expand outwards to grip the inside of a hollow item such as a cup or glass. The external jaws grip the outside of the object. These rotary attachments hold the object securely and are therefore more accurate and less prone to slippage.
Four-Wheel Rotary Attachments
Four Wheel laser rotary attahchments are similar to the roller-style rotaries, except they have four individual wheels (one in each corner) on which the bottle or glass will rest. This style of rotary axis attachment allows you to raise and the lower the height of each pair of wheels so that you can counteract the slope of tapered or "conical" bottles and tumblers.
Pro Tip: Most jaws are made of steel, so put heat shrink tubing over the ends of the jaws to prevent scratching the object being engraved.
How to Set up a Laser Rotary Attachment
There are two steps involved in working with your laser rotary attachment:
- Physically install it in your laser machine’s workbed area.
- Set up your rotary attachment in the laser engraving software (LightBurn) and the Ruida controller.
Step 1: How to Install a Laser Rotary Attachment
The first thing you will need to do is to lower the laser engraver bed to its lowest point so that the rotary attachment will fit and clear the engraving nozzle. Place the laser rotary attachment onto the workbed with the chuck on the right and square it to the edge of the bed — this ensures that you are laser engraving at the correct angle.
Now take the round plug from the rotary attachment and locate the similar socket on the right hand inside of the cabinet and connect the two. Tighten the collar to prevent the plug from falling out. Note that it only fits in one way so do not force it.
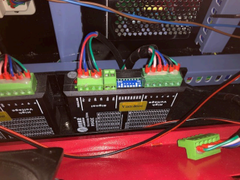
Now, making sure that the laser is switched off, open the electronics cabinet on the right-hand side of the laser engraver and locate the loose green connector. You now remove the same connector
from the Y-axis stepper motor controller and replace it with the loose connector. Now close the cabinet.

Step 2: Software Setup for Laser Rotary Attachments
Now that the controller is connected to the rotary attachment, we need to inform the software that a rotary attachment is being used. In LightBurn, open Rotary Setup under the Tools menu. In the dialog, you can now enable the rotary. For this article, we are using a Chuck rotary, so we select “Chuck” and then click to Enable Rotary. If you are using a Roller Rotary Attachment today, please make that selection instead. There is one final step needed.
Step 3: Testing Your Laser Rotary Attachment
The chuck of the rotary attachment is driven by a stepper motor. As the name implies, this motor rotates in a number of ‘steps’ and we need to set this number correctly in the software so that it knows how many pulses to send to the motor to rotate it correctly. A typical rotary attachment will need 10,000 or 15,000 pulses or steps to achieve a full rotation and so if you cannot find this number in the rotary attachment documentation you will need to guess and test. Start with 10,000 and then place a piece of tape on the top of the chuck and press the TEST button in the LightBurn dialog. LightBurn will then instruct the Ruida controller to send 10,000 pulses to the rotary. If the number is correct, the tape should end up at exactly the same position as it started - if not then you will need to change the number accordingly.
Creating the Laser Engraving Design
It’s now time to think about the design that you want to laser engrave on the glass. The first consideration is how much of the glass object can be engraved. Even though the object will be rotated, it is turned on only one axis. Therefore it cannot make any allowance for changes in height — so we need to consider any curves or ridges in the object and design the engraving with these in mind.
If the laser beam encounters a ridge in the glass, the beam will go out of focus as it travels over the ridge and will distort on the sides of the ridge - so that is not an area to engrave. If the glass object has a curve then we need to consider between what distances the laser beam remains sufficiently in focus to achieve a clean engraving. We can do this by performing a ramp test on the laser engraver and examining the resulting hourglass shape. There will be a point that the lens starts to appear sharp and where it starts to widen — for a short focal length lens this will be quite small and for a longer focal length it will be larger. The nozzle to workpiece distance from these start to finish points on the ramp test will tell us how much curvature of the glass we can successfully engrave.
When you have created your design in LightBurn, you will need to rotate it by 90 degrees so that the top of the design is on the right. This is because we are using the Y-axis to move the rotary.
How to Use a Laser Rotary Attachment
You will need at least one spare glass object to use for testing. As with any work we undertake on the laser engraver, we always need to test the material with various settings to see which works best. With a wine glass, for example, we can actually use several areas of the glass for testing.
Laser Engraving Glass Settings
On my 60W OMTech laser engraver, I start with 100mm/s speed and 25% max power and 20% min power in the CUTS/LAYERS dialog for any Line layers and 100mm/s speed and 20% max and min power for any Fill layers.
- Clean the object using some isopropyl alcohol to remove any grease or contamination and then place it into the rotary and tighten the chuck to grip it firmly but not so tight as to crack it!
- Use the Up and Down arrows on the laser keypad to rotate the rotary, ensuring that the object is centered.
- Position the design correctly so that it aligns with the object in the rotary. If you have a camera installed, that makes things easier, but don’t worry if you don’t. Start by moving the design to the approximate position on the LightBurn screen. Then click the ‘move head’ button on the left-hand menu and click the centre of the design. The rotary chuck will turn and the head on the X-axis will move. Look at where everything ended up and keep moving the design slightly left and right which will move it up and down on the object until the design is aligned with where you want it to appear on the glass.
Pro Tip: Be aware that some glassware has a moulding line — a thin “seam” where the two pieces of glass were moulded together. Always avoid the moulding line when laser engraving glass.
- Now, we need to position the design so that the top is aligned with where you want it to sit vertically on the engraved object. Using the ‘move head’ tool, click the rightmost edge of the design and the head on the X-axis will move.
- Grasp the whole of the X-axis and slowly move it manually so that the head sits right over the middle of the object.
- Use the Frame button in the Laser dialog of LightBurn, you should see the head and chuck all move to show the extremes of the engraving. You can also use the ‘move head’ button to double-check everything.

Focusing Your Laser Engraver
Normally when laser engraving, the workpiece is perfectly flat and so we focus the laser on the surface of the material. However, a lot of glass drinkware is curved and so we need to find the position whereas much of the engraving is in focus as possible. If you are dealing with a very slight curve you can ignore this and just focus on the closest point to the nozzle — but with more curvature, you may need to experiment more to find the ideal focus point.
Fill Line Interval
If you are engraving lines then the only settings you need to worry about are speed and power. Experiment with different settings until you find the best ones for your laser engraver and glass. If you are creating thick letters or shapes then you may be using the fill mode. In this case, you also need to consider the Line interval or LPI (Lines Per Inch) which is how far the laser beam is moved for each engraving pass. A low LPI can create visible lines whereas a high LPI can put too much heat into the glass causing it to crack. Again, this is where you need to experiment to see which gives you the best results. I start with 0.1mm (254 LPI) but have also had good results at 0.08mm (318 LPI).
Air flow
When laser engraving glass, you don’t need a lot of air at the nozzle, so if you have adjustable air assist then keep it at a minimum with just sufficient air to create positive pressure in the nozzle to keep the lens clean.
How to Laser Engrave a Champagne Glass
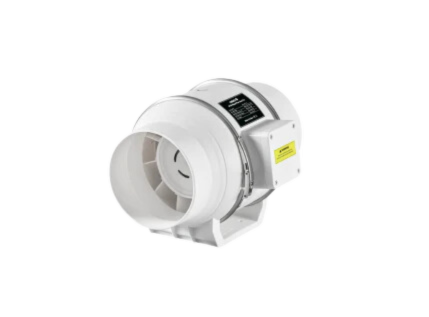
You should now have the glass securely mounted in the chuck. The head should be sitting over the centreline of the object and focused on the glass. You can now start the engrave with the ventilation fan running, cooling water temperatures below 68°F (20°C), and the lid closed.
Never leave your laser machine unattended while operating. Observe the laser for signs of fire and use the emergency stop button if needed.
After the engraving has finished, you can examine the result (I recommend using a magnifying glass) and check that it has engraved evenly and as desired. You can make adjustments to speed and power as needed to create a more or less defined image.
How to Finish Laser Engraved Champagne Glasses
The next step is extremely important. As explained earlier, laser engraving glass involves micro fracturing the surface and this creates very small particles of extremely sharp glass. So you will need hand and eye protection when handling the engraved glass. You will also need a wire brush or a wire wheel on an electric drill (you could also use a Dremel type drill) to go over the engraving. This will remove those glass particles and make the finished engraving smooth to the touch. The wire brush will not damage the glass.

Pro Tips: How to Laser Engrave a Champagne Flute
- If your design is fairly simple, then the engraving should be completed quickly with no damage to the glass, however, if you have a fairly complex design then you can place a piece of wet paper inside the glass underneath where it will be engraved making sure there are no air bubbles. This will absorb some of the heat from the laser and help prevent cracking.
- Fill + Line or Offset Fill layers are not recommended when engraving glass as the final effects are not pleasing to the eye and Offset Fill can put too much heat into the glass at a time causing it to crack more easily.
- Try to keep your designs simple and provide sufficient space between each object. As the glass micro-fractures, it does so with a randomness that is outside of our control. Although these pieces are microscopic, it does restrict the level of detail that can be obtained and very small text or fine details can run into each other if too small or too close together. Different types of glass will behave differently — another good reason to test on a spare one first.

Conclusion: Laser Engraving Round Glasses
Laser engraving glass is quite a simple technique once you have learned to set up the laser engraver and rotary attachment. Plus, the engraving jobs take very little time to complete. The opportunity to create unique laser engraved gifts is only limited by your imagination, and they make perfect wedding gifts as well as anniversaries. Bulk glassware can be purchased very cheaply and the engraving can add significant value.
In my laser engraving business, one customer asked for a pair of engraved champagne flutes for their wedding but after seeing examples and understanding the low cost of the flutes, they purchased an order for 120 to give as mementos to all of their guests. Even with such a high number, due to the quick engraving time, it was a relatively short (and profitable) production time. Other laser engraved cups and glasses have been for retirement gifts — you can also engrave the matching bottle of spirits!
Now that you have started learning how to laser engrave glass, you can expand your horizons with other types. Experiment and test different types of glass and as with all materials, remember to record your results in the LightBurn materials library.
Good luck!
–Steve Congrave
OMTech User & Staff Writer


