


How to Prepare and Setup Your Laser Engraver Workshop
Introduction
The Do-It-Yourself (DIY) mindset is a special one: it requires a “failure is not an option” attitude, and you must be willing to adapt and overcome challenges as they arise. To successfully operate an industrial-grade laser machine, you’ll need to adopt this DIY mindset.
There is no magical black-box laser machine that can read your mind and output what you are thinking. Instead, it requires you, the user, to instruct it through software, calibrate it, focus it, and test it to achieve your desired results. As you prepare your laser engraving workspace and begin to set up your laser machine, remember to be patient and take advantage of all of OMTech’s support resources. To get the learning process started efficiently, you should thoroughly review your laser machine’s manual before it arrives.
In this article, we will review some considerations you should keep in mind for your laser workshop, how to prepare your workspace before laser machine delivery, how to uncrate your laser machine, and lastly, how to install your laser machine.
Laser Engraver Workshop/Room Considerations
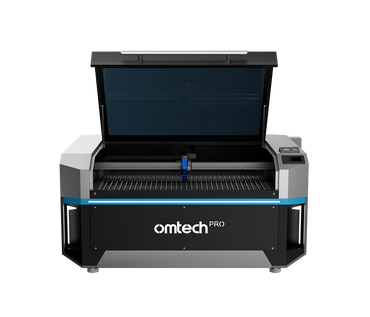
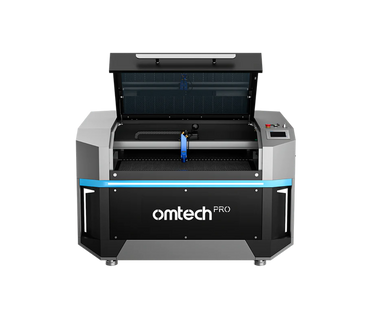
Choosing where to locate your laser machine is just as important as choosing which laser machine to purchase. Having your workshop ready to go on #laserday (the day the laser arrives) is an important step in ensuring a smooth installation. There are more detailed location selection instructions in section 3.2 of your machine manual. Here are some guidelines on how to choose where to locate your laser machine:
Space Considerations
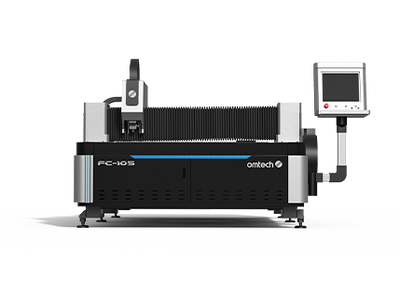
Measure how much space you have available while also keeping in mind the considerations listed below. Ensuring the laser will fit through the path from outside the building to the workshop location (doors, hallways, or turns). Each machine’s dimensions are included in the “Convenient Size” section of its listing webpage. You want to look for the bullet point that states “overall dimensions,” not “engraving/cutting area.” The overall dimensions listed here include any standoffs or protrusions, such as the external tube cover found on the right rear of the AF2028-80 laser machine. Note: the overall dimensions do NOT include the height with the hood open or any passthrough or side panel doors open.
Lastly, if you plan on using the passthrough, consider keeping the laser far enough away from the wall or other obstructions so that the passthrough doors are accessible and your material can be loaded and unloaded easily.
Electrical Considerations:
Mid-range laser machines require one electrical outlet, while high-power laser machines require two. It is recommended to use a dedicated 110V circuit with a 20-amp breaker (110V 20A). If you live outside the USA or have an old home/building without proper grounding, you will also need to consider grounding the machine to a building ground line. If you live in the USA and/or have a home with a 3-prong plug where the 3rd prong is a ground, you do not need to add an additional ground to the machine.
The electrical cord that comes with the machine is roughly 5ft long, so your machine needs to be placed in a location that will reach the outlet. Extension cords are not recommended, but if you must use one, you should only use a 3 prong extension cord with at least 12 gauge or larger wire (note that wire gauge numbers are opposite: lower gauge number means larger wire size). Also, ensure the extension cord is rated for a minimum of 20 amps.
Exhaust/Ventilation Considerations:
The recommended way to ventilate the laser machine is to exhaust the 6” hose out a window or dedicated vent to the outside. The laser machine includes a built-in fan (or fans depending on the model). If you plan on using these as the only ventilation, you will want to keep the exhaust hose as short as possible. This means keeping the exhaust port of the unit close to a window or exhaust vent. Most mid-range laser machines have the exhaust port on one side of the machine, while most high-power laser machines have the exhaust port(s) on the rear of the machine.
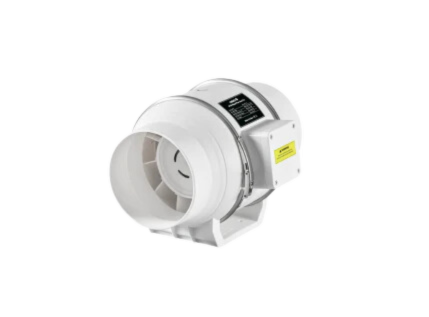
A very common upgrade is to purchase an inline fan to help remove the fumes/smoke. OMTech offers multiple options for inline fans (linked below). When installing an inline fan, you want to keep the fan as close to where the exhaust exits your building as possible. This will suck the fumes out of your machine much better than trying to push them through the long tube.
- Recommended: AC Infinity Cloudline S6
- Alternate: AC Infinity Cloudline T6
If you do not have adequate access to an external vent, OMTech also offers air filtration systems (linked below).
Warning: Do NOT use vents that are being used for other purposes, such as dryer vents or dust collection systems. The smoke/fumes being extracted from the laser machine can be hot which increases the potential fire risk if the smoke/fumes come into contact with dryer lint or wood dust.
Chiller / Water Pump Cooling:
Each laser machine comes with a water pump (or a chiller when specifically stated). The water pump is used to pump water from a reservoir (bucket or tub) through the laser tube to keep it cool and operating at peak performance. If you choose to utilize the water pump, you will need to monitor the water temperature (the easiest way is by purchasing a digital thermometer separately).
For minimal to average laser machine use, you will need to add frozen water bottles to the water reservoir to keep the water temperature within the recommended water temperature range (16-21°C / 60-70°F).
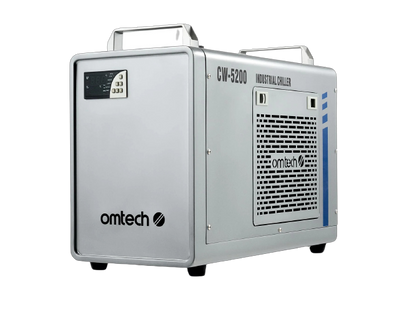
A more convenient and consistent method for water cooling is to use an industrial water chiller. A laser water chiller either uses fans or a refrigeration compressor to cool the water. OMTech offers multiple water chillers (linked below).
CW-3000 9L Industrial Water Cooling System – Uses fans to remove heat from the water. Recommended for K40 laser machine size.
CW-5200 6L Industrial Water Chiller – Uses refrigeration compressor to chill the water to a user-set temperature. Recommended for 50W and larger laser machines.
CW-5202 6L Dual Industrial Water Chiller – Uses refrigeration compressor to chill the water to a user-set temperature. Capable of cooling 2 laser tubes (dual laser head machine or two separate laser machines). Recommended for 50W and larger laser machines. This is a great option for aspiring professionals who might purchase a second machine in the future, as it can also accommodate one laser at a time.
Preparing Your Workspace
-
Thoroughly clean your workspace and the surrounding area. Your laser’s new home should be free from dust and airborne pollutants. If you’re working out of your garage or shed, it might require deep cleaning.
-
If you are using an external vent or fume extractor for the laser machine, have it installed and ready to be used.
-
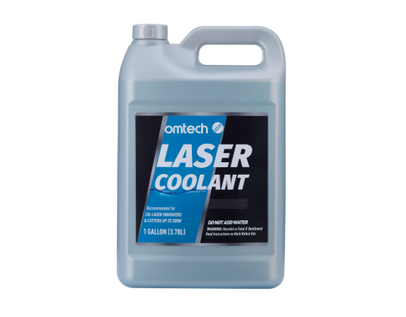
Depending on your laser tube cooling plan, you will need to have 2-3 gallons of distilled water on hand for the water pump or chiller.
-
Have access to a dedicated 120V 20A circuit.
-
You’ll need an impact drill with a Phillips #2 attachment and a 5/16" nut driver on hand for removing the bolts that secure the laser machine standoffs to the bottom of the crate.
-
Recognize the total weight of your laser machine and be realistic about how many people you need to help move it. 150W machines weigh over 1,000 lbs. You may need to rent a hand truck, forklift or hire a professional moving service. You can find the total weight in section 1.4 of your machine’s manual.
-
Find the path of least resistance: the route you’ll take to move your new laser machine from your driveway into your workshop. Remove any items or potential trip hazards from the path to your laser’s new home.
Uncrating and Installation
To uncrate your laser machine, follow the steps below:
- Before you begin uncrating, thoroughly review section 3.3 of your machine’s manual.
- Inspect the crate for any damage and take pictures if damage is found.
- Remove the screws on the bottom of each side of the crate. These are the screws that attach the sides of the crate to the bottom (pictured below). Depending on how large your machine is, there should be 2 or 3 screws on all four sides of the crate. I recommend using a drill or electric screwdriver to remove these.

- Using at least 2 people, lift the top of the crate up and over the laser machine and set it aside.
- Inspect the laser machine for any damage and take pictures of damage if found. If the damage is significant, you will want to contact OMTech Support before going any further.
- Remove the bolt from each laser machine standoff that secures the laser machine to the bottom of the crate (pictured below).

- Screw the laser machine standoffs upward into the machine until the machine is resting only on the wheels.
- Using at least 2 people (or power equipment), remove the machine from the bottom part of the crate. IMPORTANT: Do NOT injure yourself when doing this. If you are unable to have able-bodied people do this, consider renting a forklift or equivalent. Depending on your specific situation, an appliance dolly may work as well.
- Roll the machine to the desired location.
- Optional but recommended: Level the machine using a level by adjusting the laser machine standoffs until the machine is level front to back and side to side.
To finish installing your laser machine, follow the steps below:
- Using the hose(s) and hose clamp(s) provided, hook up the ventilation hose(s). Refer to your manual, section 3.6.
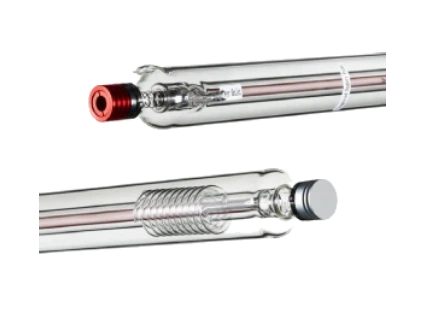
- If your laser tube came installed, skip to step 3. If your laser tube came uninstalled, you will need to install it. Warning: Be very careful as the tube is made of glass and is fragile. Also, do NOT plug the laser machine into a power outlet at this time.
- Inspect the laser tube for cracks and document any issues with pictures.
- If no issues are found, install the laser tube and secure it per the manufacturer’s instructions.
- Hook up all water lines and electrical lines to the laser tube.
- Hook the water pump or chiller lines to the laser machine. These instructions are detailed in your manual, section 3.5. Important notes:
- The water pump or chiller outlet goes to the inlet on the rear of the laser machine.
- The outlet on the rear of the laser machine goes to the inlet of the water pump reservoir or chiller.
- Ensure no kinks or pinches are present in any of the water hoses. This includes water hoses inside the laser machine.
- Fill the water pump reservoir or chiller with distilled water (2-3 gallons depending on your model).
- Turn on the water pump or chiller.
- Check for leaks at all connection points (this includes connection points inside the laser machine and on the laser tube). Then, check for water leaks in the outer portion of the laser tube. There should only be water present inside the inner portion.
- Check the laser tube for bubbles.
- If bubbles are found, try turning the pump/chiller off and back on a few times.
- If that does not work, try moving the water reservoir or chiller physically higher than the laser tube while running.
- If you are using a chiller, you will want to set the desired temperature range per the manufacturer’s instructions.
- Hook up the USB or network cable to the laser machine.
- With all doors closed on the laser machine, you can now plug it into a wall outlet. Remember to use a dedicated 110V 20A circuit. Note that some models (high-power) require two separate power cords to plug in.
Conclusion
Now that you’ve made it this far, you will move on to the ramp test, focusing your laser, and using the Ruida controller. To begin testing your laser machine for optimal performance, follow the instructions in your manual, section 3.9 “Initial Testing.”
Remember that setting up and using a laser machine requires the DIY mindset and a determination to overcome any obstacle that arises. Good luck, and remember that OMTech has a fantastic community of laser users just like you, ready to help at any time! Happy lasering!
Introduction
The Do-It-Yourself (DIY) mindset is a special one: it requires a “failure is not an option” attitude, and you must be willing to adapt and overcome challenges as they arise. To successfully operate an industrial-grade laser machine, you’ll need to adopt this DIY mindset.
There is no magical black-box laser machine that can read your mind and output what you are thinking. Instead, it requires you, the user, to instruct it through software, calibrate it, focus it, and test it to achieve your desired results. As you prepare your laser engraving workspace and begin to set up your laser machine, remember to be patient and take advantage of all of OMTech’s support resources. To get the learning process started efficiently, you should thoroughly review your laser machine’s manual before it arrives.
In this article, we will review some considerations you should keep in mind for your laser workshop, how to prepare your workspace before laser machine delivery, how to uncrate your laser machine, and lastly, how to install your laser machine.
Laser Engraver Workshop/Room Considerations
Choosing where to locate your laser machine is just as important as choosing which laser machine to purchase. Having your workshop ready to go on #laserday (the day the laser arrives) is an important step in ensuring a smooth installation. There are more detailed location selection instructions in section 3.2 of your machine manual. Here are some guidelines on how to choose where to locate your laser machine:
Space Considerations
Measure how much space you have available while also keeping in mind the considerations listed below. Ensuring the laser will fit through the path from outside the building to the workshop location (doors, hallways, or turns). Each machine’s dimensions are included in the “Convenient Size” section of its listing webpage. You want to look for the bullet point that states “overall dimensions,” not “engraving/cutting area.” The overall dimensions listed here include any standoffs or protrusions, such as the external tube cover found on the right rear of the AF2028-80 laser machine. Note: the overall dimensions do NOT include the height with the hood open or any passthrough or side panel doors open.
Lastly, if you plan on using the passthrough, consider keeping the laser far enough away from the wall or other obstructions so that the passthrough doors are accessible and your material can be loaded and unloaded easily.
Electrical Considerations:
Mid-range laser machines require one electrical outlet, while high-power laser machines require two. It is recommended to use a dedicated 110V circuit with a 20-amp breaker (110V 20A). If you live outside the USA or have an old home/building without proper grounding, you will also need to consider grounding the machine to a building ground line. If you live in the USA and/or have a home with a 3-prong plug where the 3rd prong is a ground, you do not need to add an additional ground to the machine.
The electrical cord that comes with the machine is roughly 5ft long, so your machine needs to be placed in a location that will reach the outlet. Extension cords are not recommended, but if you must use one, you should only use a 3 prong extension cord with at least 12 gauge or larger wire (note that wire gauge numbers are opposite: lower gauge number means larger wire size). Also, ensure the extension cord is rated for a minimum of 20 amps.
Exhaust/Ventilation Considerations:
The recommended way to ventilate the laser machine is to exhaust the 6” hose out a window or dedicated vent to the outside. The laser machine includes a built-in fan (or fans depending on the model). If you plan on using these as the only ventilation, you will want to keep the exhaust hose as short as possible. This means keeping the exhaust port of the unit close to a window or exhaust vent. Most mid-range laser machines have the exhaust port on one side of the machine, while most high-power laser machines have the exhaust port(s) on the rear of the machine.
A very common upgrade is to purchase an inline fan to help remove the fumes/smoke. OMTech offers multiple options for inline fans (linked below). When installing an inline fan, you want to keep the fan as close to where the exhaust exits your building as possible. This will suck the fumes out of your machine much better than trying to push them through the long tube.
- Recommended: AC Infinity Cloudline S6
- Alternate: AC Infinity Cloudline T6
If you do not have adequate access to an external vent, OMTech also offers air filtration systems (linked below).
Warning: Do NOT use vents that are being used for other purposes, such as dryer vents or dust collection systems. The smoke/fumes being extracted from the laser machine can be hot which increases the potential fire risk if the smoke/fumes come into contact with dryer lint or wood dust.
Chiller / Water Pump Cooling:
Each laser machine comes with a water pump (or a chiller when specifically stated). The water pump is used to pump water from a reservoir (bucket or tub) through the laser tube to keep it cool and operating at peak performance. If you choose to utilize the water pump, you will need to monitor the water temperature (the easiest way is by purchasing a digital thermometer separately).
For minimal to average laser machine use, you will need to add frozen water bottles to the water reservoir to keep the water temperature within the recommended water temperature range (16-21°C / 60-70°F).
A more convenient and consistent method for water cooling is to use an industrial water chiller. A laser water chiller either uses fans or a refrigeration compressor to cool the water. OMTech offers multiple water chillers (linked below).
CW-3000 9L Industrial Water Cooling System – Uses fans to remove heat from the water. Recommended for K40 laser machine size.
CW-5200 6L Industrial Water Chiller – Uses refrigeration compressor to chill the water to a user-set temperature. Recommended for 50W and larger laser machines.
CW-5202 6L Dual Industrial Water Chiller – Uses refrigeration compressor to chill the water to a user-set temperature. Capable of cooling 2 laser tubes (dual laser head machine or two separate laser machines). Recommended for 50W and larger laser machines. This is a great option for aspiring professionals who might purchase a second machine in the future, as it can also accommodate one laser at a time.
Preparing Your Workspace
-
Thoroughly clean your workspace and the surrounding area. Your laser’s new home should be free from dust and airborne pollutants. If you’re working out of your garage or shed, it might require deep cleaning.
-
If you are using an external vent or fume extractor for the laser machine, have it installed and ready to be used.
-
Depending on your laser tube cooling plan, you will need to have 2-3 gallons of distilled water on hand for the water pump or chiller.
-
Have access to a dedicated 120V 20A circuit.
-
You’ll need an impact drill with a Phillips #2 attachment and a 5/16" nut driver on hand for removing the bolts that secure the laser machine standoffs to the bottom of the crate.
-
Recognize the total weight of your laser machine and be realistic about how many people you need to help move it. 150W machines weigh over 1,000 lbs. You may need to rent a hand truck, forklift or hire a professional moving service. You can find the total weight in section 1.4 of your machine’s manual.
-
Find the path of least resistance: the route you’ll take to move your new laser machine from your driveway into your workshop. Remove any items or potential trip hazards from the path to your laser’s new home.
Uncrating and Installation
To uncrate your laser machine, follow the steps below:
- Before you begin uncrating, thoroughly review section 3.3 of your machine’s manual.
- Inspect the crate for any damage and take pictures if damage is found.
- Remove the screws on the bottom of each side of the crate. These are the screws that attach the sides of the crate to the bottom (pictured below). Depending on how large your machine is, there should be 2 or 3 screws on all four sides of the crate. I recommend using a drill or electric screwdriver to remove these.
- Using at least 2 people, lift the top of the crate up and over the laser machine and set it aside.
- Inspect the laser machine for any damage and take pictures of damage if found. If the damage is significant, you will want to contact OMTech Support before going any further.
- Remove the bolt from each laser machine standoff that secures the laser machine to the bottom of the crate (pictured below).
- Screw the laser machine standoffs upward into the machine until the machine is resting only on the wheels.
- Using at least 2 people (or power equipment), remove the machine from the bottom part of the crate. IMPORTANT: Do NOT injure yourself when doing this. If you are unable to have able-bodied people do this, consider renting a forklift or equivalent. Depending on your specific situation, an appliance dolly may work as well.
- Roll the machine to the desired location.
- Optional but recommended: Level the machine using a level by adjusting the laser machine standoffs until the machine is level front to back and side to side.
To finish installing your laser machine, follow the steps below:
- Using the hose(s) and hose clamp(s) provided, hook up the ventilation hose(s). Refer to your manual, section 3.6.
- If your laser tube came installed, skip to step 3. If your laser tube came uninstalled, you will need to install it. Warning: Be very careful as the tube is made of glass and is fragile. Also, do NOT plug the laser machine into a power outlet at this time.
- Inspect the laser tube for cracks and document any issues with pictures.
- If no issues are found, install the laser tube and secure it per the manufacturer’s instructions.
- Hook up all water lines and electrical lines to the laser tube.
- Hook the water pump or chiller lines to the laser machine. These instructions are detailed in your manual, section 3.5. Important notes:
- The water pump or chiller outlet goes to the inlet on the rear of the laser machine.
- The outlet on the rear of the laser machine goes to the inlet of the water pump reservoir or chiller.
- Ensure no kinks or pinches are present in any of the water hoses. This includes water hoses inside the laser machine.
- Fill the water pump reservoir or chiller with distilled water (2-3 gallons depending on your model).
- Turn on the water pump or chiller.
- Check for leaks at all connection points (this includes connection points inside the laser machine and on the laser tube). Then, check for water leaks in the outer portion of the laser tube. There should only be water present inside the inner portion.
- Check the laser tube for bubbles.
- If bubbles are found, try turning the pump/chiller off and back on a few times.
- If that does not work, try moving the water reservoir or chiller physically higher than the laser tube while running.
- If you are using a chiller, you will want to set the desired temperature range per the manufacturer’s instructions.
- Hook up the USB or network cable to the laser machine.
- With all doors closed on the laser machine, you can now plug it into a wall outlet. Remember to use a dedicated 110V 20A circuit. Note that some models (high-power) require two separate power cords to plug in.
Conclusion
Now that you’ve made it this far, you will move on to the ramp test, focusing your laser, and using the Ruida controller. To begin testing your laser machine for optimal performance, follow the instructions in your manual, section 3.9 “Initial Testing.”
Remember that setting up and using a laser machine requires the DIY mindset and a determination to overcome any obstacle that arises. Good luck, and remember that OMTech has a fantastic community of laser users just like you, ready to help at any time! Happy lasering!
Author Bio:
Patrick S.
When the COVID-19 pandemic hit in early 2020, my kids (9, 7, and 4 at that time) and I found we had a ton of extra time on our hands. Instead of spending this time on screens, I decided we should learn a new skill. While I've always done some woodworking mainly for our own use, we purchased a small CNC diode laser and learned how to use that. We gave away many items and eventually had people asking us to make them custom things, so we started asking them to pay. From this, our "accidental side business" was born. We ended up purchasing an OMTech laser to aid in our ability to engrave and cut wood at speed. Today, we have a CNC wood router, a small diode laser, an OMTech 60W 20"x28" laser machine, and an OMTech 130W 35”x55” laser machine.
If you'd like to check out some of the awesome things we've been able to make with our laser, check out or Facebook page: https://www.facebook.com/sticksandstoneswrkshop